Boosting Ghidra: How to Turn Gemini CLI into a Reverse Engineering Assistant.
A guide to setting up GhidraMCP using Gemini-CLI on Ubuntu 24.04 for autonomous reverse engineering with LLMs.
Introduction to GhidraMCP
GhidraMCP (Model Context Protocol) is a powerful server that extends Ghidra’s capabilities, allowing Large Language Models (LLMs) to interact with and perform autonomous reverse engineering tasks. By exposing core Ghidra functionalities to MCP clients, GhidraMCP facilitates advanced analysis workflows, making it an invaluable tool for researchers and security professionals.
This guide will walk you through the process of installing GhidraMCP on Ubuntu 24.04 using gemini-cli, ensuring you have all the necessary components for an efficient setup.
Prerequisites
Before you begin, ensure you have the following installed on your Ubuntu 24.04 system:
- Python 3: Ubuntu 24.04 typically comes with Python 3 pre-installed. You can verify this by running
python3 --version. - gemini-cli: Ensure you have
gemini-cliinstalled and configured. This guide assumes you are operating within agemini-clienvironment. - uv: I use uv to avoid python packages pollution on my personnal laptop
Step 1: Install the Ghidra Package
According to the GhidraMCP GitHub Releases page, Ghidra MCP plugin is compatible with Ghidra 11.3.2. So let’s download it :
1
2
3
4
sudo wget -P /opt https://github.com/NationalSecurityAgency/ghidra/releases/download/Ghidra_11.3.2_build/ghidra_11.3.2_PUBLIC_20250415.zip
sudo unzip /opt/ghidra_11.3.2_PUBLIC_20250415.zip
sudo rm /opt/ghidra_11.3.2_PUBLIC_20250415.zip
sudo mv /opt/ghidra_11.3.2_PUBLIC_20250415.zip /opt/ghidra_11.3.2
Check if you can run it :
1
bash /opt/ghidra_11.3.2/ghidraRun
Step 2: Install GhidraMCP Plugin
The first step is to install the GhidraMCP plugin directly into your Ghidra installation.
- Download the latest GhidraMCP Release: Visit the GhidraMCP GitHub Releases page and download the
GhidraMCP 1.4version source code.You also follow the official installation guide (README)
1
2
3
4
5
6
7
8
# Download the MCP server source code
wget -P /tmp https://github.com/LaurieWired/GhidraMCP/releases/download/1.4/GhidraMCP-release-1-4.zip
unzip /tmp/GhidraMCP-release-1-4.zip
rm /tmp/GhidraMCP-release-1-4.zip

# Move bridge python script to /opt
sudo mkdir -p /opt/ghidra_11.3.2/Bridge_MCP
sudo mv /tmp/GhidraMCP-release-1-4/bridge_mcp_ghidra.py /opt/ghidra_11.3.2/Bridge_MCP
You need to configure uv for the /opt/ghidra_11.3.2/Bridge_MCP directory:
1
2
3
4
5
6
7
8
9
10
11
cd /opt/ghidra_11.3.2/Bridge_MCP

# 1. Initialize the uv project (if not already done)
sudo uv init --app --name ghidra-bridge

# 2. Add the libraries (this creates uv.lock and .venv)
sudo uv add mcp requests

# 3. Fix permissions (Reminder)
sudo chown -R root:$USER /opt/ghidra-mcp
sudo chmod -R 750 /opt/ghidra-mcp
Install the plugin in Ghidra:
- Please check the official README for video examples
- Launch Ghidra.
- Navigate to
**File -> Install Extensions...**. - Click the
+button in the top right corner of the “Install Extensions” window. - Browse to and select the
GhidraMCP-1-4.zipfile you downloaded. - Click
**OK**, then**Finish**to install. - Restart Ghidra when prompted to complete the installation.
- Verify and Configure:
- Please check the official README for video examples
- After restarting Ghidra, go to
**File -> Configure -> Developer**and ensure thatGhidraMCPPluginis enabled. - (Optional) You can configure the HTTP server port for GhidraMCP by navigating to
**Edit -> Tool Options -> GhidraMCP HTTP Server**. The default port is usually sufficient.
Step 3: Configure gemini-cli
After downloading gemini-cli, to configure it to use GhidraMCP, please add the following configuration to ~/.gemini/settings.json:
1
2
3
4
5
6
7
8
9
10
11
12
13
14
15
16
  "mcpServers": {
    "ghidra": {
      "command": "uv",
      "args": [
        "run",
        "--frozen",
        "--directory", "/opt/ghidra_11.3.2/Bridge_MCP",
        "bridge_mcp_ghidra.py",
        "--transport", "stdio",
        "--ghidra-server", "http://127.0.0.1:8080/"
      ],
      "env": {
        "UV_PROJECT_ENVIRONMENT": "/opt/ghidra_11.3.2/Bridge_MCP/.venv"
      }
    }
  }
Now, you can use gemini-cli with Ghidra!
Conclusion
You have successfully installed GhidraMCP and set up its Python client on Ubuntu 24.04 using gemini-cli. You are now ready to begin leveraging LLMs for autonomous reverse engineering within Ghidra. Refer to the GhidraMCP documentation for detailed information on integrating with specific LLM clients and advanced usage.
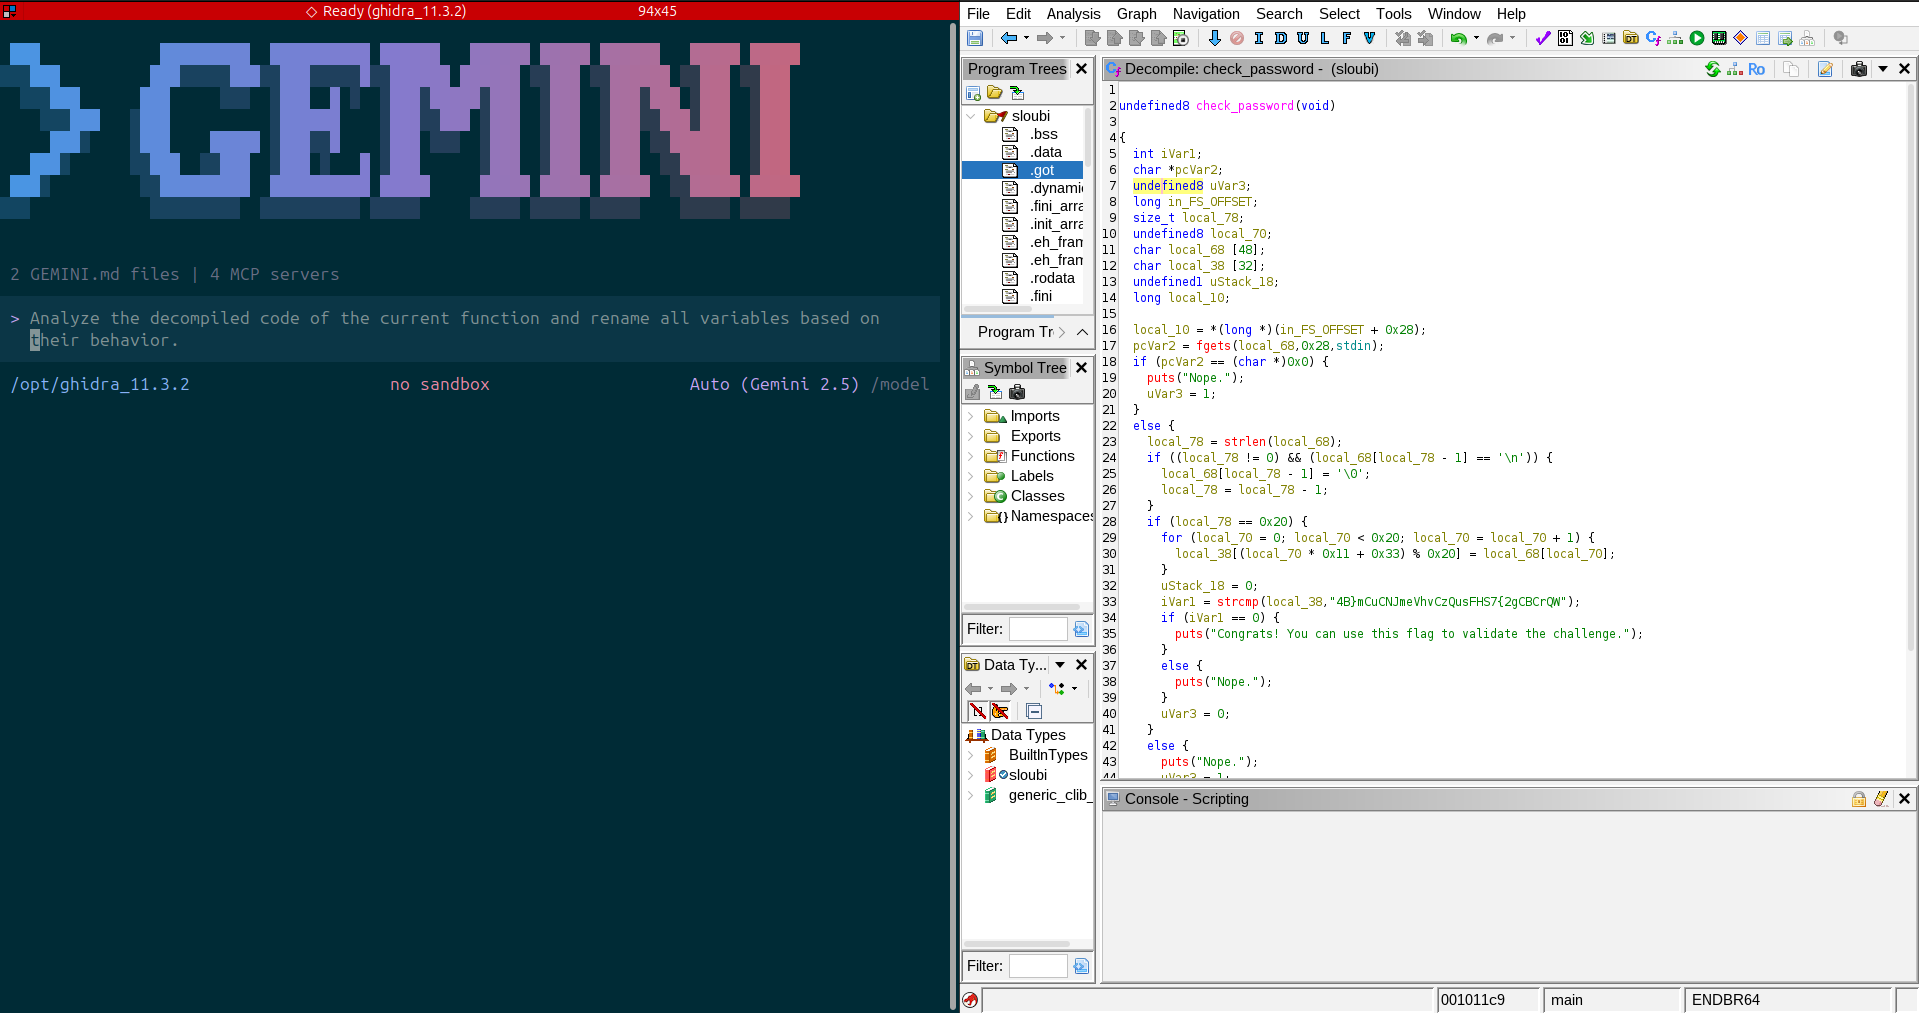
Before :
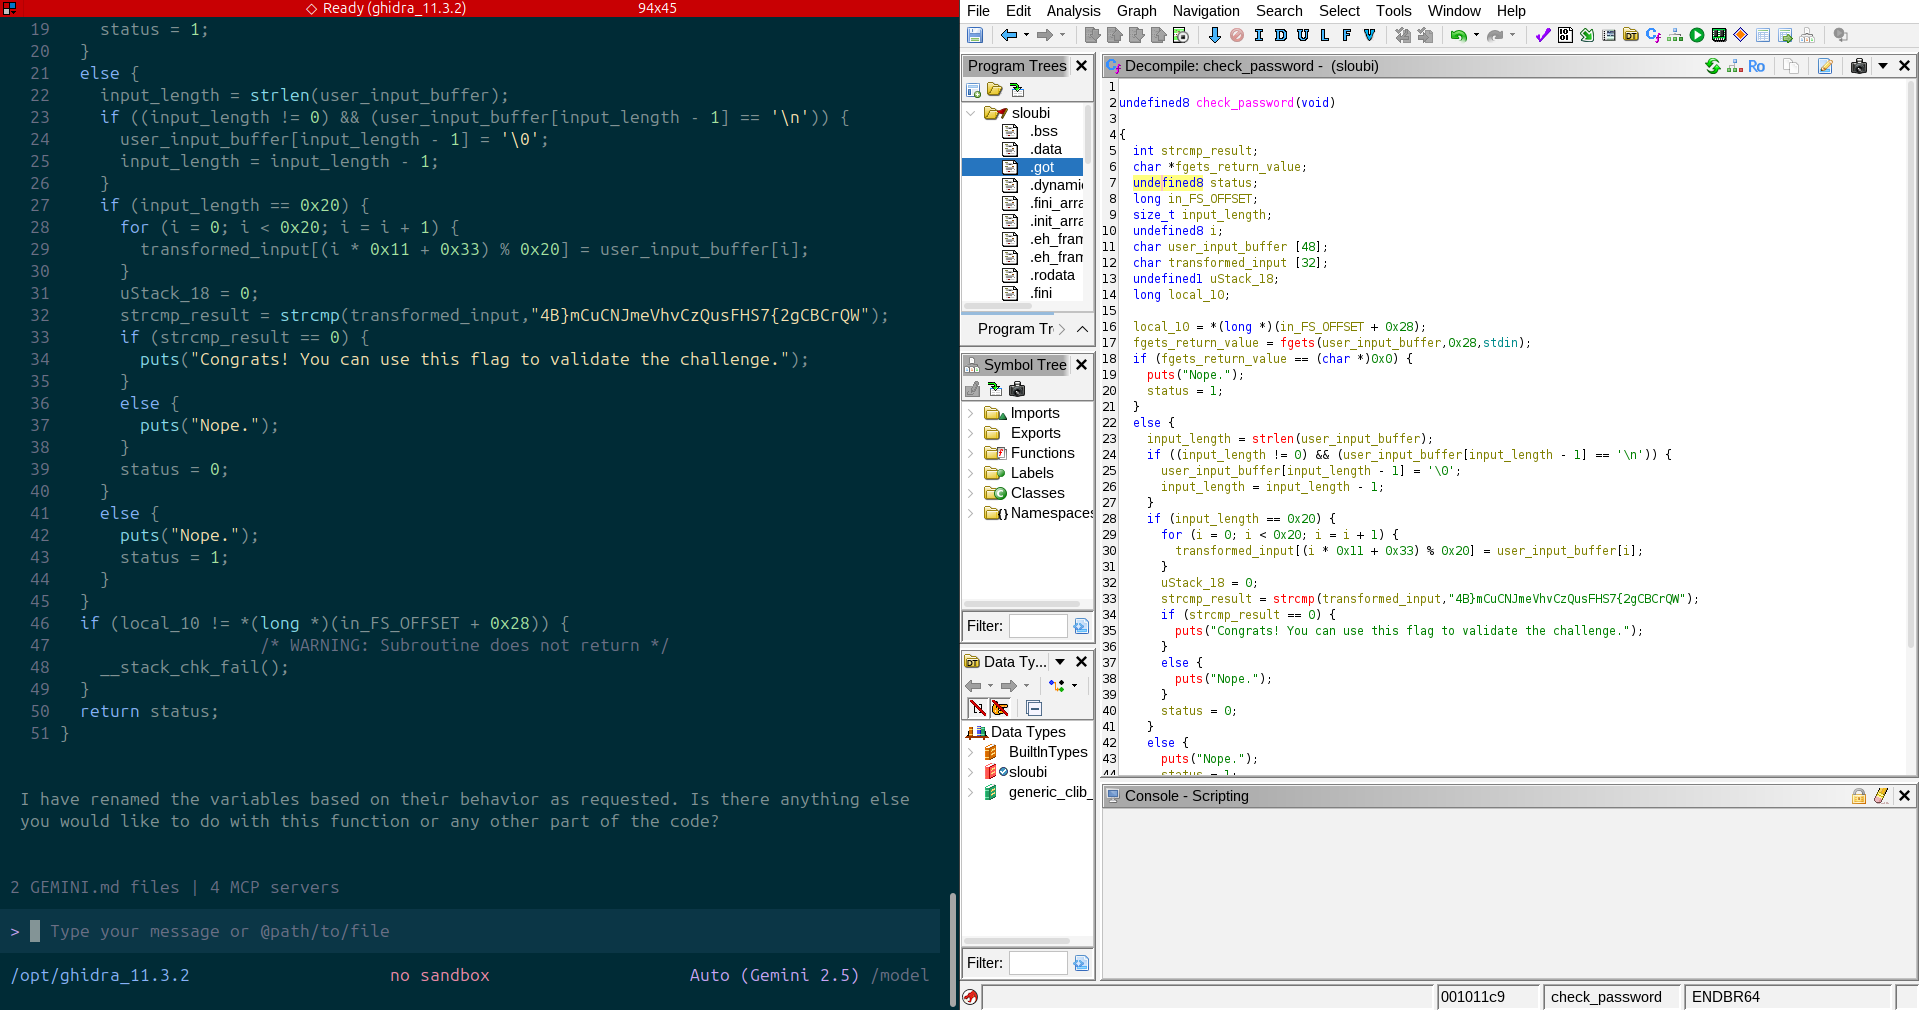
After :
I hope this tutorial has helped you, and I’m open to any feedback and suggestion about it or my blog posts!